
The first step on this journey is to prepare the USB key. Having burned so many CD and DVD discs in the past when doing install, I feel that this is a long overdue feature from the folks in Redmond. Having done this for my RC install, I can tell you it is not too difficult, just poorly documented.
Gather the right requirements. In order to do this you will need the following things:
- Ensure the target computer can boot from USB
- The Windows 7 disc or ISO
- A USB key of at least 4gb in size
- A Vista or newer machine
Then follow these steps:
- Launch a command windows with administrator permissions. To do this, you right click on Start > Accessories > Command Prompt and select Run as administrator.
- Insert USB key
- Type
diskpartinto the command shell - Type
list disk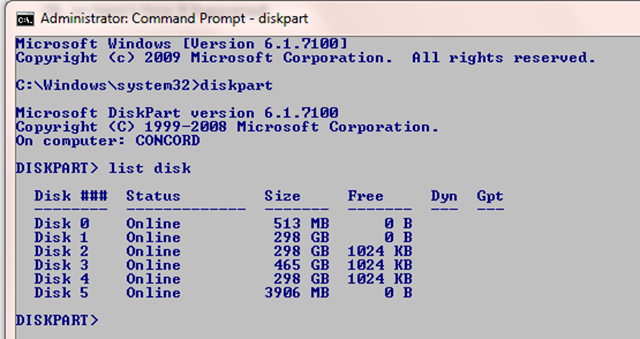
list_disk - Yes. I have a few too many drives. However, in this case, the drive I care about is number 5, so type
select disk 5, replacing 5 with the number of the drive you are interested in. - Type
clean - Type
create partition primary - Type
select partition 1 - Type
active - Type
format fs=NTFS quickNote: You can (and should) omit quick if this is the first time using this USB key in this way - Type
assign - Type
exit
Now we need to make the USB key bootable. So CD into the boot directory of the Windows 7 installation disk.
- Type
bootsect /nt60 j:1Note: Replace the drive letter with the one assigned to your USB key - Exit the command shell
- Copy all the contents of the Windows 7 installation disc to the USB key
Now comes the easy part. Boot the new computer using the USB key.